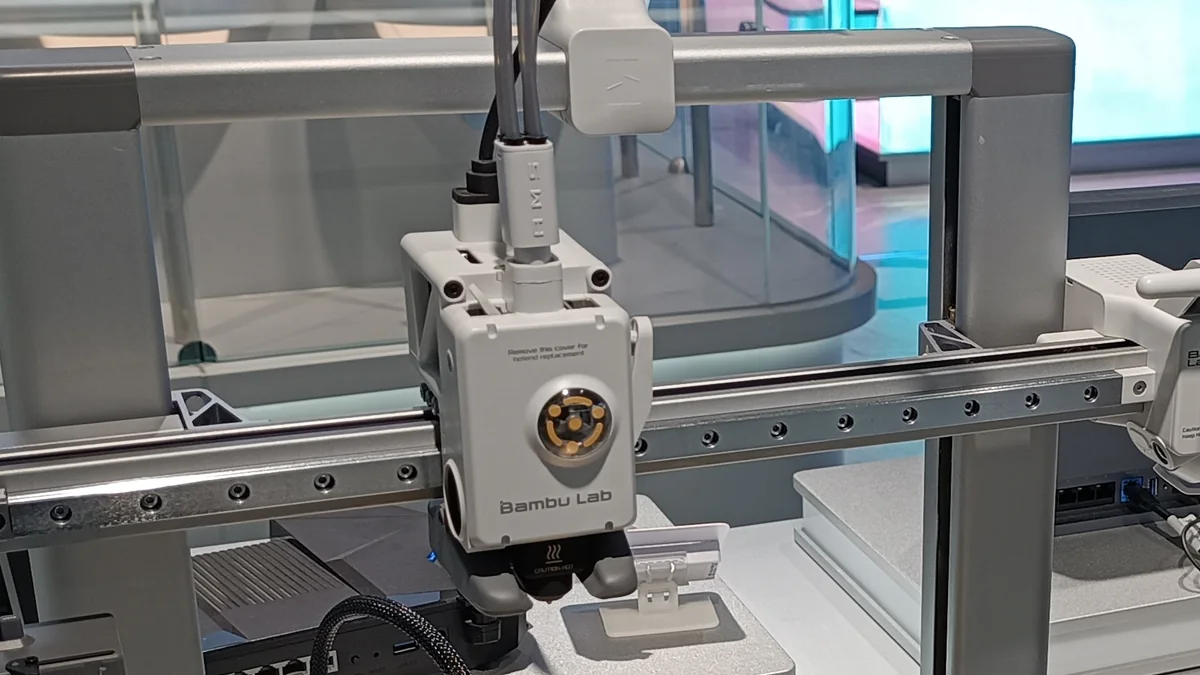
Quick answer: Power the A1 off, make sure the nozzle is cool, cut/release the loaded filament, remove the toolhead cover and silicone sock, release the hotend retaining clip, remove the hotend, seat the replacement fully, lock it back in place, reinstall the sock and cover, then confirm the correct nozzle settings before testing.
When Should You Replace an A1 Hotend?
A hotend change can make sense when a nozzle is physically damaged, a clog cannot be cleared by normal troubleshooting, extrusion remains inconsistent after the filament path has been checked, or you intentionally want a different nozzle diameter or nozzle material. Do not assume every under-extrusion problem means the hotend is bad. A tangled spool, wet filament, feeder problem or partial blockage farther up the filament path can create similar symptoms.Before You Start
- Finish or cancel the current print.
- Allow the nozzle to cool before touching the hotend.
- Turn the printer off before removing the hotend.
- Have the correct replacement hotend ready.
- Know the nozzle diameter and material you are installing so the printer/slicer can be set correctly afterward.
Safety: A recently used nozzle can cause serious burns. Do not judge temperature by appearance. Let it cool and verify before handling it.
How to Replace the Bambu Lab A1 Hotend
1. Power down and cool the nozzle
Bambu’s official A1 guide begins by turning the printer off and ensuring the nozzle is not hot. If filament is still loaded, follow the normal unloading/cutting process so the hotend can come out cleanly.2. Cut or release the filament
Use the A1’s filament cutting/release mechanism as directed in the official procedure. You do not want a long strand of filament mechanically tying the hotend to the rest of the filament path while you pull the assembly out.3. Remove the front toolhead cover
Remove the front cover carefully and set it aside. Avoid pulling on wiring or using the cover as leverage.4. Remove the silicone sock
Take the silicone sock off the hotend. This exposes the metal hotend and the retaining system. If there is a small amount of residue on the outside, you can inspect it while everything is accessible.5. Release the hotend clip
Open the retaining clip that locks the hotend into the A1 toolhead. The quick-swap design means the removable hotend itself can be changed without treating the job like a full heater and thermistor rebuild.6. Remove the old hotend
Pull the hotend out in the intended direction. If it does not want to move, stop and re-check the clip and filament rather than forcing it.
7. Install the replacement hotend
Seat the new hotend completely in the toolhead. It should sit correctly before the retaining clip is locked. If the part is crooked or not fully seated, do not use the clip to force it home.8. Lock the clip and reinstall the silicone sock
Secure the retaining mechanism, then reinstall the silicone sock so it fits the hotend properly.9. Reinstall the toolhead cover
Put the cover back in place and make sure nothing is pinched or left hanging loose.After the Hotend Change
Confirm the nozzle diameter and type
If you changed from one diameter or nozzle material to another, update the printer and slicer settings so they match what is physically installed. Printing a 0.6 mm nozzle with a 0.4 mm nozzle profile is an easy way to create avoidable quality and flow problems.Load filament and watch the first extrusion
Load a known-good filament and watch it extrude. Look for a steady strand rather than clicking, grinding or intermittent flow.Run a small test before a long job
Use a short test print before committing to something that will run overnight. Watch the first layer and confirm normal heating, extrusion and motion.
Common Mistakes During an A1 Hotend Replacement
- Working while the nozzle is still hot: the most obvious and most avoidable risk.
- Forcing the hotend: usually a sign that the retaining clip or filament has not been dealt with correctly.
- Forgetting the silicone sock: reinstall it before returning to normal printing.
- Leaving the wrong nozzle profile selected: especially after moving between 0.4 and 0.6 mm.
- Starting a long print immediately: test first so a simple installation issue does not waste hours of filament.
Frequently Asked Questions
Do I need to unplug heater wires to change the A1 hotend?
The A1’s quick-swap hotend design is intended to make the removable hotend easier to change than a traditional fully wired hotend assembly. Follow Bambu’s official A1 replacement procedure for the exact mechanism.Can I switch from a 0.4 mm to a 0.6 mm hotend?
Yes, provided you install a compatible hotend and then select settings that match the new nozzle diameter in the printer and Bambu Studio.Should I calibrate after changing the hotend?
At minimum, verify the correct nozzle configuration and run a test print. If print behaviour is abnormal, follow the printer’s normal calibration and troubleshooting workflow.Does a clog always mean the hotend needs replacement?
No. Many clogs can be cleared. Replacement is more appropriate when the hotend is damaged or normal unclogging procedures do not solve the problem.Need something printed instead of troubleshooting it?
3D Print BC offers FDM printing for prototypes, replacement parts and small production runs across Canada. Visit 3DPrintBC.com.
Technical Reference
Bambu Lab Wiki: Hotend Replacement for A1. Independently written by 3D Print BC; not affiliated with or endorsed by Bambu Lab.
Need a part printed?
Turn the guide into a real part.
Upload your STL/3MF or tell 3D Print BC what you need. We’ll review the project and help you choose the right material and print approach.